Intro to OSTicket
Here are some basic tips on how to use OSTicket
NOTE: Do not update this page. This page is soft linked to IT - Sysadmin > OSTicket > Intro To OSTicket. If you want to change the contents of this page, please change it on that page instead.
Here are some basic tips on how to use OSTicket
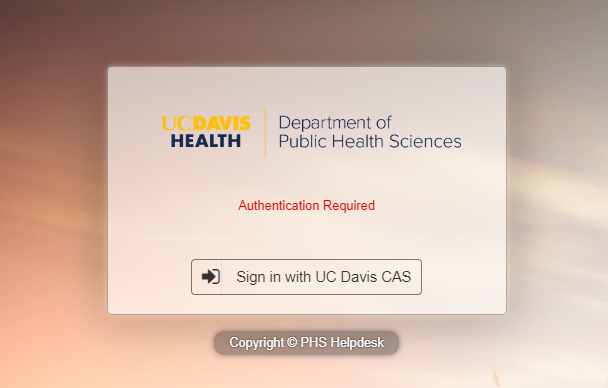
Agent Login
You can log into the agent portal at this link https://servicedesk.phs.ucdavis.edu/scp/login.php
and click on Sign in with UC Davis CAS
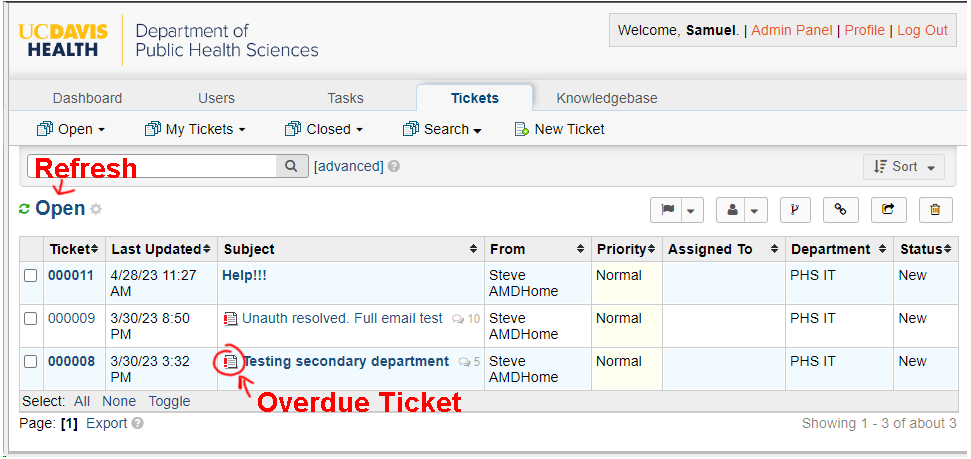
Ticket Queue List
After logging in, you will be dropped into the Ticket List view. This will show you a list of tickets as well as some basic information
- Tickets in bold are ones where the last message was from a client. You should take a look and respond to them.
- Tickets that are not bolded are tickets where the last message posted was by an Agent.
- Overdue tickets will have a little overdue icon next to the subject line
- In the upper lefthand corner you can click on the List name or the green refresh icon to refresh the list of tickets
To view a ticket click on the ticket number or the subject
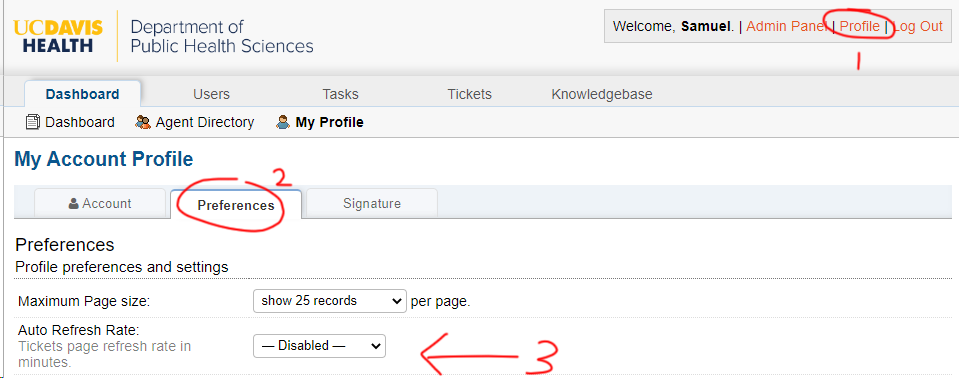
Auto Refresh Queue
This list does not refresh automatically by default. We suggest you enable auto refresh in your profile settings so new tickets automatically show up in the queue. You can do this by:
- Click on the
Profilebutton in the top right hand corner of the page - Click on the
Preferencestab - Set a time for
Auto Refresh Rate- While you're here, take a look at the other options and set up your account/signature.
- Click Save at the bottom

Changing Ticket List Columns.
If you are unhappy with the columns that are shown by default, You can customize this to your liking.
- Hover over the little gear icon next to the list name and click on
edit
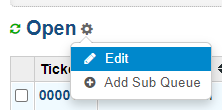
- In the window that pops up, go to the
Columnstab - Uncheck
Use standard columnsand you can edit which columns show up. - Click the yellow
Savebutton when you are done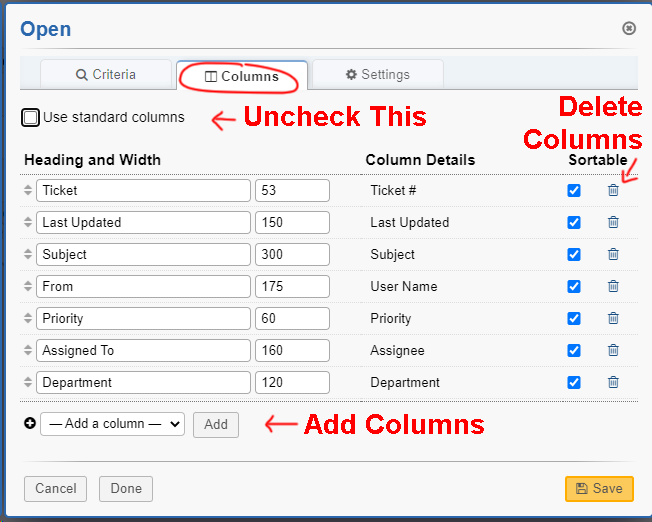


Ticket View
After Clicking on a ticket, you will be brought to the Ticket view.
The ticket view consists of 3 parts
- Ticket Info
- Ticket Thread
- Response box
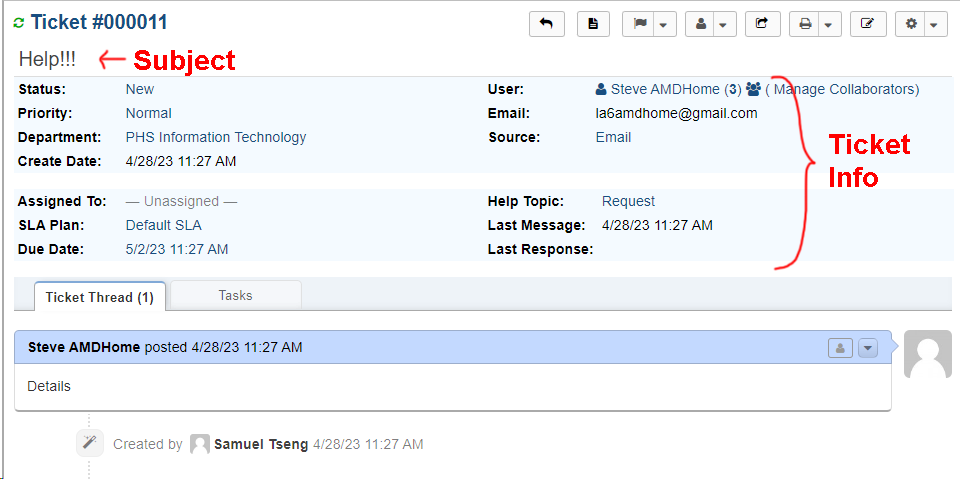
Ticket Info
At the top of the Ticket View you have the Ticket info. Most things here can be changed by simply clicking on it. A new window will pop up allowing you to change the value.
Ticket Thread
This is where all the communication between your helpdesk and the customer will be. It operates like any other messaging service.
- Blue Boxes are Client Responses
- Orange/Peach colored boxes are agent replies
- Yellow Boxes are internal notes.
Response box
The response box is where you can post an internal note or reply back to the customer.
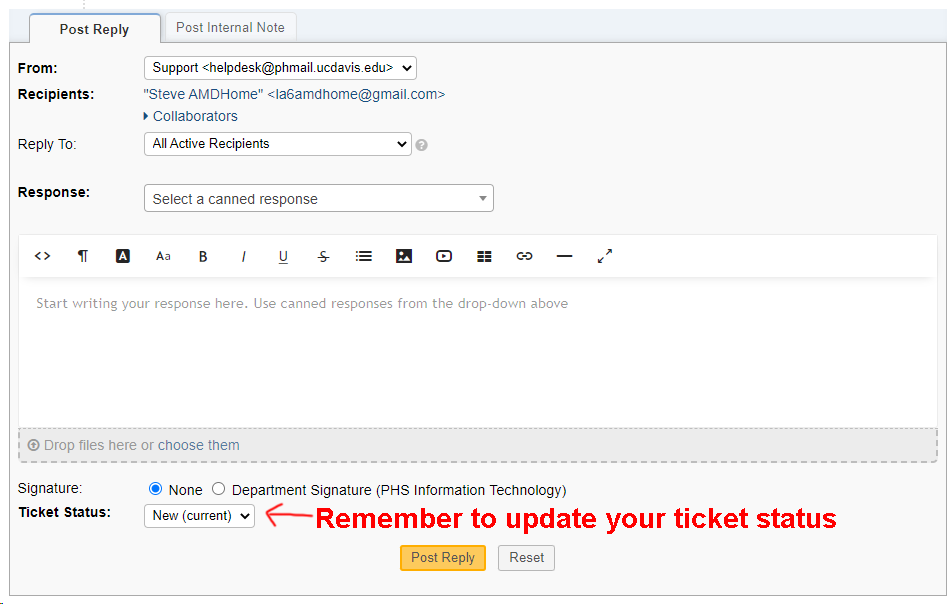
Post reply
This works more or less like an email. Anything you post in this tab will be sent to the customer and anyone else that is cc-ed (collaborators).
Before posting make sure you update the ticket status (If applicable). If the status is currently set to new you will want to change it to open to signify that you
Internal Notes
Internal notes will only be viewable from the Ticket View. It is meant to store notes that are used internally by your department