How do I add an appointment to the MS1C Conference Room calendar?
- Go to Calendar view in Outlook
- Create new appointment in your calendar or the calendar of the person on whose behalf you are scheduling the appointment.
(Do NOT create the appointment within the MS1C Conference Room Calendar.) - Click “+ Add a Zoom Meeting”.
(If you do not see “ + Add a Zoom Meeting”, download and install the Zoom Plugin for Microsoft Outlook: https://zoom.us/download).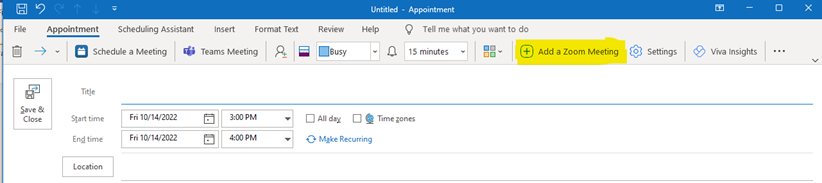
- If a Zoom sign-in prompt appears, follow the following instructions to log in. Otherwise proceed to step 5:
- Click the SSO button at the bottom of the prompt.
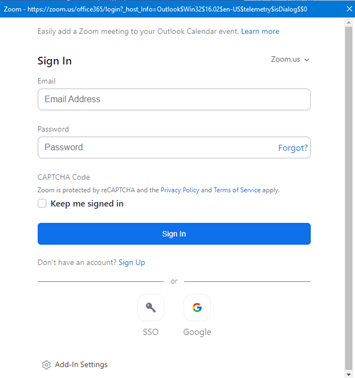
- Enter
ucdavisin the Domain field and click Continue.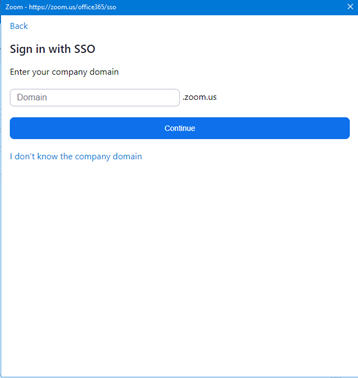
- You’ll be redirected to the UCD ADFS prompt. Enter your UCD email address and password and click the Sign In button.

- Click the SSO button at the bottom of the prompt.
- After signing in the Zoom meeting details will automatically be placed in the appointment details.
Modify the Title of the appointment, if desired.
- In the top ribbon of the Appointment window click Scheduling Assistant. Click Add Attendees
- Change the Address Book to Global Address List
- Type
MS1Cinto the search field and press the Enter key.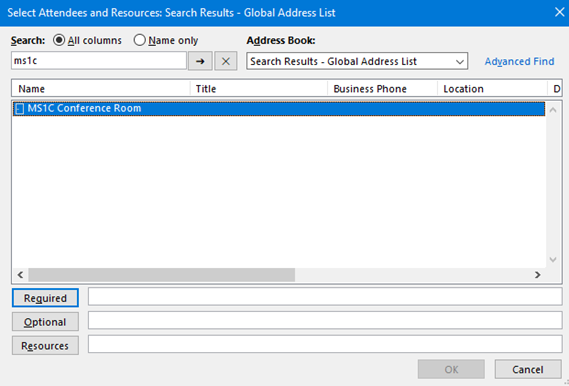
- Click MS1C Conference Room in the search results and then click Required.
- Repeat steps 6-9 to add another people who should be invited to the Appointment.
- Click “Meeting” in the top ribbon to view the updated details.
Verify that those you selected as attendees should be listed, and MS1C Conference Room should appear in the Required and Location fields.
The Zoom meeting link should also appear in the Location field. - Click the Send button to add the appointment.
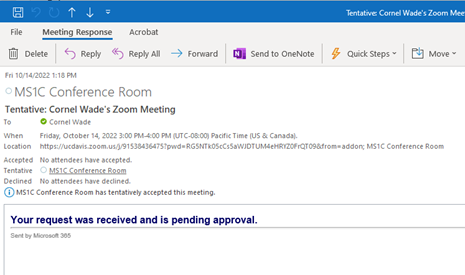
You will receive an email notification confirming that your appointment has been Tentatively scheduled and is pending approval.
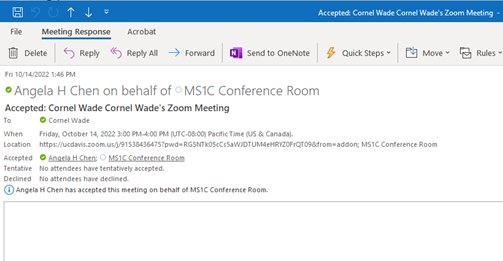
You will receive an Accepted notification when the appointment has been approved